If you’re looking to remove vinyl flooring, you’ve come to the right place. In this blog post, we will give you a step-by-step guide on how to do just that. From removing luxury vinyl to glue down vinyl flooring and getting rid of stubborn leftover adhesives from plywood and concrete subfloors, we’ll give you the rundown on all of it. So, whether you’re wanting to replace your vinyl flooring or are looking to save money and time by DIYing your way through some home renovations, we have you covered!
Steps to Take Before Removing Vinyl Flooring
1. Gather Your Tools
First step in removing vinyl flooring is having the right tools. You’ll need certain supplies handy depending on the type of vinyl flooring you have. For a floating floor (meaning it’s not glued down), tools such as a claw hammer, trim puller, pliers, and utility knife should be enough to get the job done. If you’re flooring is secured down using adhesive/ glue, you’ll need a heat gun, floor scraping tools, and potentially vinyl flooring adhesive remover.
In addition to these tools, you may want to pick up a shop vacuum to safely pickup leftover debris, eye protection, work gloves, a respirator (if using chemical solutions), and thick garbage bags. Make sure you have these items on hand before beginning the project.
2. Clear the Area
Obviously, you don’t want couches, beds, carpets, and other décor sitting on your vinyl flooring while you’re in the process of removing it. So, before you get started, empty the room, and give yourself a clear work area.
3. Remove Baseboards
Baseboards generally sit on the flooring’s edges. So, before you start pulling up your vinyl flooring, the baseboards need to be removed. Here’s how you do it:
- Start at the top of the baseboard where the wall and trim meet. Using a light touch, take the utility knife and run it across the seam to loosen the caulk or dried paint. It’s important to break this seal before prying the baseboard away to avoid damaging the drywall.
- Look at the bottom of the baseboard. Is there quarter-round moulding or trim in place? If so, you’ll need to remove it with a trim puller as well as any nails that are left behind using pliers.
- When the baseboard is free of obstruction and adhesion, gently pry the board loose using the trim pulling tool and pull the baseboard away from the wall. Once a good portion of the baseboards have been removed, you should be able to finish the job by hand.
🔍 Explore Our Collections
Buy direct & save. 85,000 sqft MEGA WAREHOUSE. Over 300 products in stock!
Visit our showroom today for unbeatable prices and quality products!
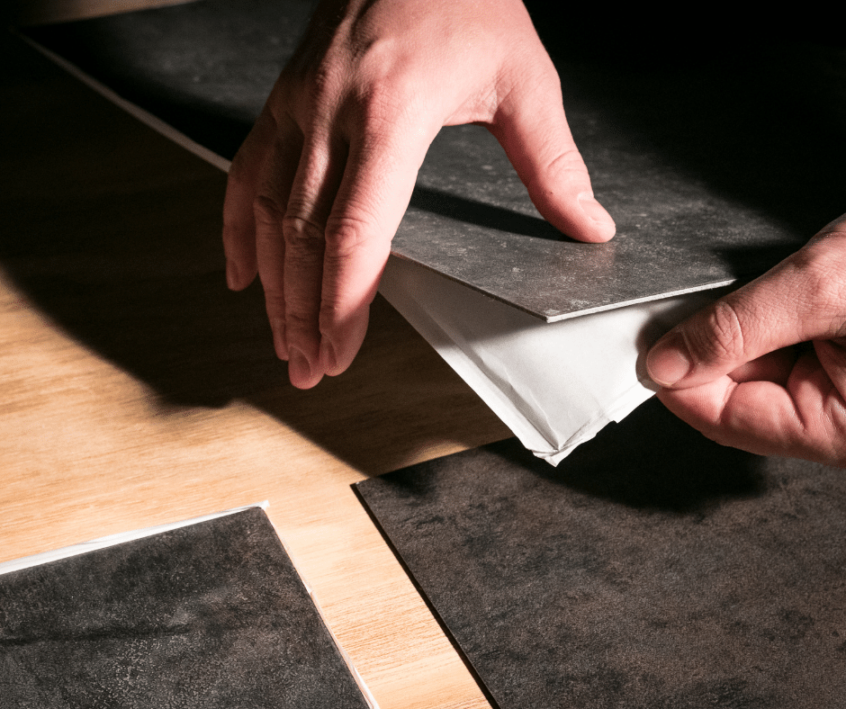
How to Remove Luxury Vinyl Flooring
Now it’s time to start yanking up that vinyl flooring. To start, we’re going to discuss how to remove floating vinyl flooring such as luxury vinyl planks, luxury vinyl tiles, WPC flooring, and SPC flooring. While some of these styles can be glued down, they’re typically free floating, secured only by the baseboards. This makes the removal process incredibly simple!
To start, go to the corner of the room or find an edge of the wall. With the baseboards already removed, simply lift up on a section of vinyl flooring, using a claw hammer if needed, and the board should come loose. However, some boards are more tightly secured than others; therefore, to “unlock” the flooring, use a lift and twist wrist motion to undo the click-lock.
Continue this process for the entirety of the area, piling your boards as you go. When removed carefully, you should be able to reuse most of your vinyl flooring. Just inspect the edges to ensure no damage was done to the lock mechanisms and keep the reusable boards separate from the damaged ones. Once all the vinyl flooring has been removed, pull up any underlayment and vacuum the remaining debris with a shop-vac. We told you it was easy!
How to Remove Adhesive-Based Vinyl Planks and Tiles
While click-lock vinyl flooring can be removed in less than an hour, flooring that has been glued into place tends to be a bit more time-consuming. When gearing yourself up to remove glue-down vinyl, an important factor to remember is the subfloor itself. Is the vinyl flooring glued down to concrete or installed on wood (plywood, hardwood, etc.)? If it’s the former, you can use a bit more force; however, the latter requires a gentler approach to avoid damaging the wooden subfloor beneath.
Rather than starting at the corner like we did for luxury vinyl flooring, you’ll want to start in the middle of the room for adhesive-based vinyl. Using a floor scraper, gently push up or scrape near the seam of the board to see if you can pop it out of place. The board may loosen with ease or stay firmly in place (fingers crossed for the former); however, if it’s being stubborn, you may need to graduate to a heat gun or find a wider seam to get started.
If you have peel and stick vinyl tiles, the removal process is very similar; however, it requires more care due to the thin nature of the material. For thinner forms of vinyl flooring, you may need to use a razor knife between tiles in addition to a smaller hand-held scraper to gently lift the flooring out of place. Additionally, a heat gun will be an asset to loosen any stubborn adhesive.
How to Remove Leftover Glue from Vinyl Flooring
After removing glue-down vinyl flooring, odds are there will be leftover glue residue. Before you install your new flooring, this glue should be removed to provide a clean surface to work with. Here’s how you do it:
Removing adhesive from plywood
To remove glue from a wooden subfloor, your most useful tool will be a handheld scraper. While angling the edge of your scraper towards the base of the glue, apply gentle force to start, using more pressure if needed. It’s important to increase the force gradually so you’re not left with a gauged piece of wooden flooring. Luckily, glue dries down to be quite brittle; so you’ll likely lift big chunks of glue at a time, making for a simpler cleanup. You can also try a heat gun along with a scraping tool to remove old glue from the subflooring. Should there still be glue remaining, you can use a sander, however, this can be a dusty job that requires more clean-up and a respirator to avoid inhaling excess dust particles.
Removing adhesive from concrete
Glue removal from concrete can be simple or stressful, depending on the type and amount of glue that was used. The silver lining is that this type of subfloor is incredibly durable and can handle a lot more force than wood can. Therefore, if you have stubborn adhesive stuck to your concrete floors, feel free to use a tougher floor scraper. A heat gun can also be used as well as several chemical solutions. However, if using chemicals, it’s important to consider whether you have a sealed or unsealed concrete floor. Some solutions can cause oil stains when applied to unsealed concrete. Ensure you read the fine print and use the right solution for your flooring.
Looking for Vinyl Flooring Near You?
At King of Floors, we carry the largest selection of in stock vinyl flooring; offering variety in style, aesthetic, and application. To ensure you leave our showroom with the flooring that’s right for you, our team is highly trained. Equipped with industry knowledge, we can provide thorough advisement when it comes to all things vinyl flooring. If you’re looking for a new set of vinyl flooring or need help removing the flooring you already have, contact our team today!
🔍 Explore Our Collections
Buy direct & save. 85,000 sqft MEGA WAREHOUSE. Over 300 products in stock!
Visit our showroom today for unbeatable prices and quality products!