Vinyl flooring is one of the most popular types of flooring around. Especially if you’re switching up the flooring in high-moisture rooms such as your kitchen and bathrooms, vinyl is a great flooring solution. For starters, it’s incredibly versatile and easy to maintain. Vinyl is resistant to both water, staining, surface damage and is available in a wide variety of colours, patterns, and shapes. One of the most durable and scratch-resistant flooring types on the market, your vinyl flooring can last you a lifetime – if you take proper care of it. Here’s everything you need to know about this popular material and a step-by-step guide of how to clean vinyl flooring.
Tools for Light Daily Cleaning
Depending on how busy your home is – and how much time you want to dedicate to cleaning – the following tools are great for daily or weekly cleans:
- Brooms. While vinyl flooring is durable, you still want to take precautions where you can. Therefore, we suggest using a soft broom for quick sweeping to prevent scratches in the vinyl.
- Dust Mops. We love a dust mop. It’s oftentimes quicker and allows you to avoid the exhausting back and forth movements that come with operating a broom. To pick up dust particles, hair, food crumbs, and other light debris, opt for a soft dust mop to clean your vinyl flooring.
- Vacuums. Some floors can’t handle standard vacuum cleaners; however, vinyl flooring isn’t one of them. You can absolutely use a vacuum on your vinyl floors, but you should avoid using carpet attachments. These are designed to dig into thick fibers and could scratch your vinyl flooring if used.
Tools for Occasional Deep Cleaning
Occasionally, your vinyl flooring will need a more thorough cleaning than a simple sweep or vacuum. To avoid having heavy grime build-up on your vinyl flooring, we recommend deep cleaning your floors as often as your home needs. For some households, this could be weekly, bi-weekly, or monthly. So, what’s involved in a vinyl deep clean? After you remove surface dust by either sweeping or vacuuming, you’ll want to finish off with some mopping.
Now, while vinyl is water-resistant, even completely waterproof in some cases, you don’t want to go crazy on the mop job. Limit the amount of water you disperse on your floors to avoid excess moisture seeping between the vinyl planks or tiles. This could cause bubbling, corner curl, or discolouration to the vinyl. Additionally, being overgenerous with your mopping can dull the finish overtime so you really shouldn’t mop vinyl flooring more than once a week.
If you’re wondering how to clean vinyl flooring safely with a mop, here are some tools we recommend:
- Spray Mops. A huge advantage to using this type of mop is that you spray right before you wipe. Therefore, the solution doesn’t have time to sit and seep into your vinyl flooring but delivers a sparkling, sanitized finish.
- Spin Mops. This allows for hand-free wringing so you can control the amount of water you use on your vinyl flooring.
How to Clean Vinyl Flooring?
Now that we’ve covered which tools to use, here’s a step-by-step guide on how to clean vinyl flooring safely and effectively.
1. Remove Dirt and Dust
It’s important to remove surface dirt, dust, and debris from the floors first. If rubbed against vinyl flooring, grains of dirt and gravel can scratch the surface, therefore, regular sweeping or vacuuming is crucial. Make sure you get into the corners, beneath furniture, and around mats or carpets.
2. Use a Vinyl-Safe Cleaner
When mopping your vinyl flooring, you can buy a designated vinyl floor cleaning solution or make your own. Whichever you choose, make sure it doesn’t contain harsh chemicals that could damage the floors’ finish.
If choosing a commercial cleaner from the store, make sure it’s safe for vinyl flooring. Avoid ammonia-based cleaning solutions, bleach, and other harsh chemicals that could damage the finish of the vinyl. A combination of distilled water and a pH-neutral floor cleaner is enough to lift dirt and grime safely. Additionally, if you have waxed vinyl floors, you must use a product suited to them. Same goes for the opposite: unwaxed vinyl floors means you must use a no-wax cleaner. No matter which vinyl flooring cleaning solution you buy, follow the manufacturer’s instructions for optimal results.
To avoid using harsh chemicals, this easy, natural solution will cut through grime and remove stickiness. To DIY your way to cleaner vinyl flooring, follow these steps:
- Mix 1 cup of vinegar (either white or apple cider) with 1 gallon of very warm water
- Dip your mop into the solution
- Wring out your mop so it’s damp, not soaked
- Mop your vinyl flooring
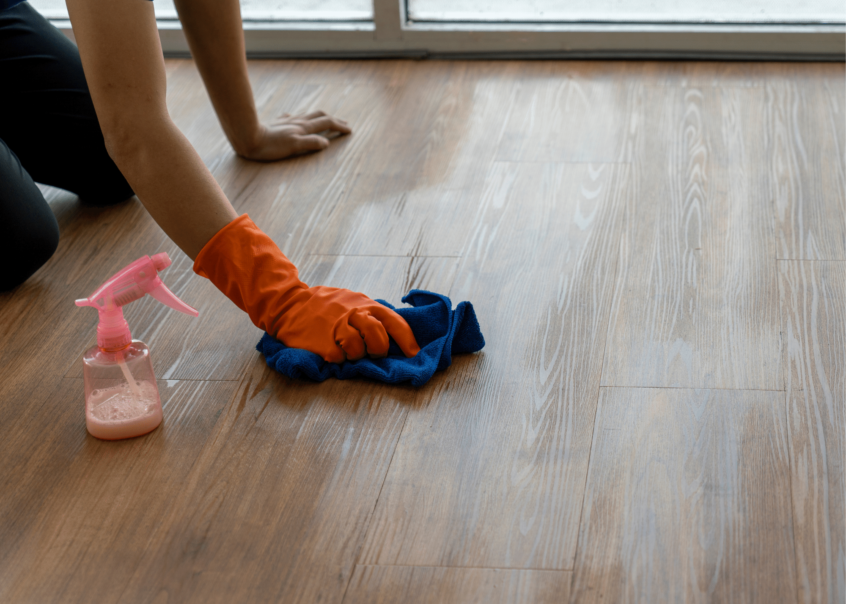
3. Mopping
When learning how to clean your vinyl flooring with a mop, the key is to use as little water as possible. While some vinyl flooring is completely waterproof, many varieties are water-resistant. Either or, there’s no need to drown your vinyl flooring to make it clean.
To mop your vinyl flooring, start at the farthest edge of the room and work your way to the entrance or exit. Douse and wring your mop as you go, changing the water and adding more solution when the water begins to look dirty.
Now, if you’re wondering how to clean textured vinyl flooring, it may require a little more elbow grease. Due to the grooves in textured vinyl flooring, dust and dirt can be a bit more stubborn to lift. However, a few extra mops over these areas should do the trick.
4. Rinse
It’s always recommended to give your vinyl flooring a quick rinse after mopping. This will prevent a sticky residue from developing and leave your vinyl floors shining, sparkling, and pristine.
After mopping, fill a bucket with clean water and mop the floor. You can also pour a small amount of water directly onto the vinyl floors and immediately wipe with a dry cloth. To really finish the job, dry your floors using a clean towel or cloth.
How to Remove Stains and Stubborn Scuffs
We’ve covered the basics of how to clean vinyl flooring, but what about those stubborn areas? To ensure your cleaning your floors safely and effectively, here’s everything you need to know:
1. Cleaning Scuff Marks
Scuff happens. Luckily, there’s a simple and effective way to remove scuff marks from your vinyl flooring. All you need is WD-40 or jojoba oil, and a soft cloth. Apply a small amount of WD-40 or oil to the soft cloth and rub it into the scuffs. Surface marks will lift immediately, however, deeper, or older marks will require some tough scrubbing with the soft cloth. If you can’t get rid of the marks after a few tries, the vinyl tile or plank may need replacing.
2. Cleaning Stains
Baking soda to the rescue! If you have stains from juice, food, wine, etc. on your vinyl flooring, baking soda is slightly abrasive while still being safe to use. Making it the perfect solution to cut through grease and stains. To use this DIY method, mix equal parts baking soda and water to form a paste. Apply the paste to your dry vinyl flooring and rub it into the stain using a soft cloth.
3. Cleaning Ink, Marker, and Makeup
Whether it’s your kids deciding to use the vinyl flooring as their personal canvas or an oopsie- daisy with a tube of opened mascara, rubbing alcohol is the quick, instant solution to lift ink, marker, and makeup. Rubbing alcohol will cut through the pigment without damaging the floor. Apply a small amount to the stained area and wipe immediately with a soft cloth. You can also use acetone-free nail polish remover to lift spilled polish. Please note, nail polish remover with acetone will damage your vinyl flooring so ensure you’re only using acetone-free.
4. Scrubbing Vinyl Flooring
You may have noticed that all the tips specify to use a soft cloth to scrub. This is because hard-bristled brushes can damage vinyl flooring by scratching the top layer. If you can’t seem to get the job done with a soft cloth, you can use a scrub brush with soft bristles such as nylon. However, even with a soft brush, ensure you’re not scrubbing too hard. It’s best to scrub gently for longer than cause damage by using too much force.
The Do’s and Don’ts of How to Clean Vinyl Flooring
Don’t use…
- Too much water
- Abrasive cleaners
- Stiff, hard-bristled brushes
- Carpet accessories on a vacuum cleaner, such as beater bars
Do Use…
- Soft cloths
- Vinyl-safe commercial cleaners or DIY solutions
- Felt pads on the legs of furniture to protect the floors from scratches
- Rugs in high-traffic areas
- Doormats to encourage people to wipe their feet before stepping on the vinyl flooring
- Maintenance cleaning tips to wipe up spills as soon as they happen
Looking for Vinyl Flooring Near You?
At King of Floors, we carry the largest selection of in stock vinyl, laminate, and engineered hardwood flooring in the country. Our team is highly trained and equipped with industry knowledge to ensure you leave our showroom with the flooring that is right for you. If you’re looking for a new set of vinyl flooring or need help upkeeping the flooring you already have, contact our team today!