
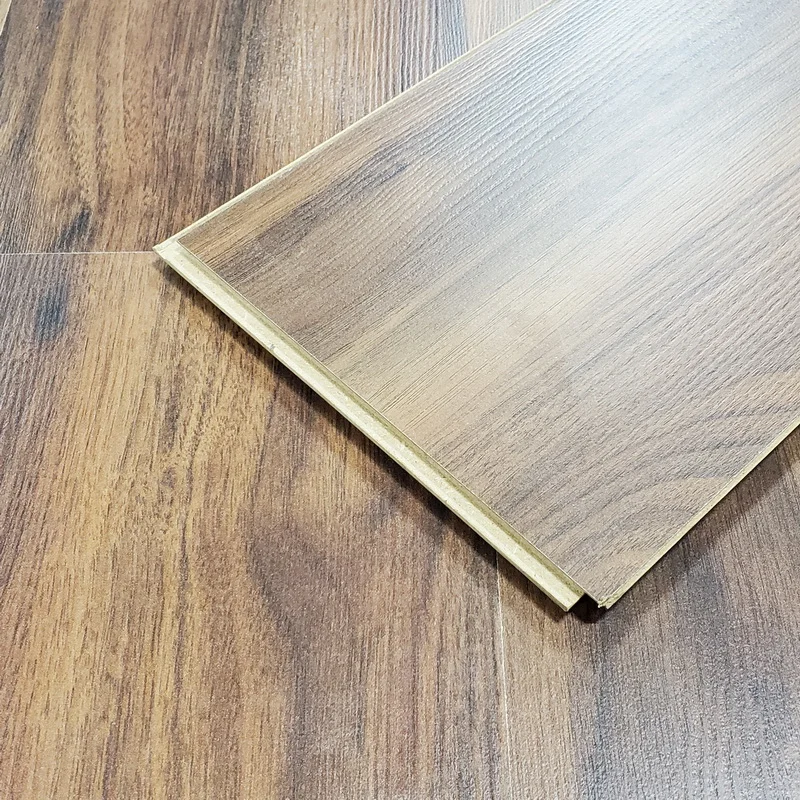
Why Laminate Wood Flooring Installation is the Top Choice for Surrey Homes
Laminate wood flooring installation is one of the most beginner-friendly home improvement projects you can tackle on a weekend. Here is a quick overview of how it works:
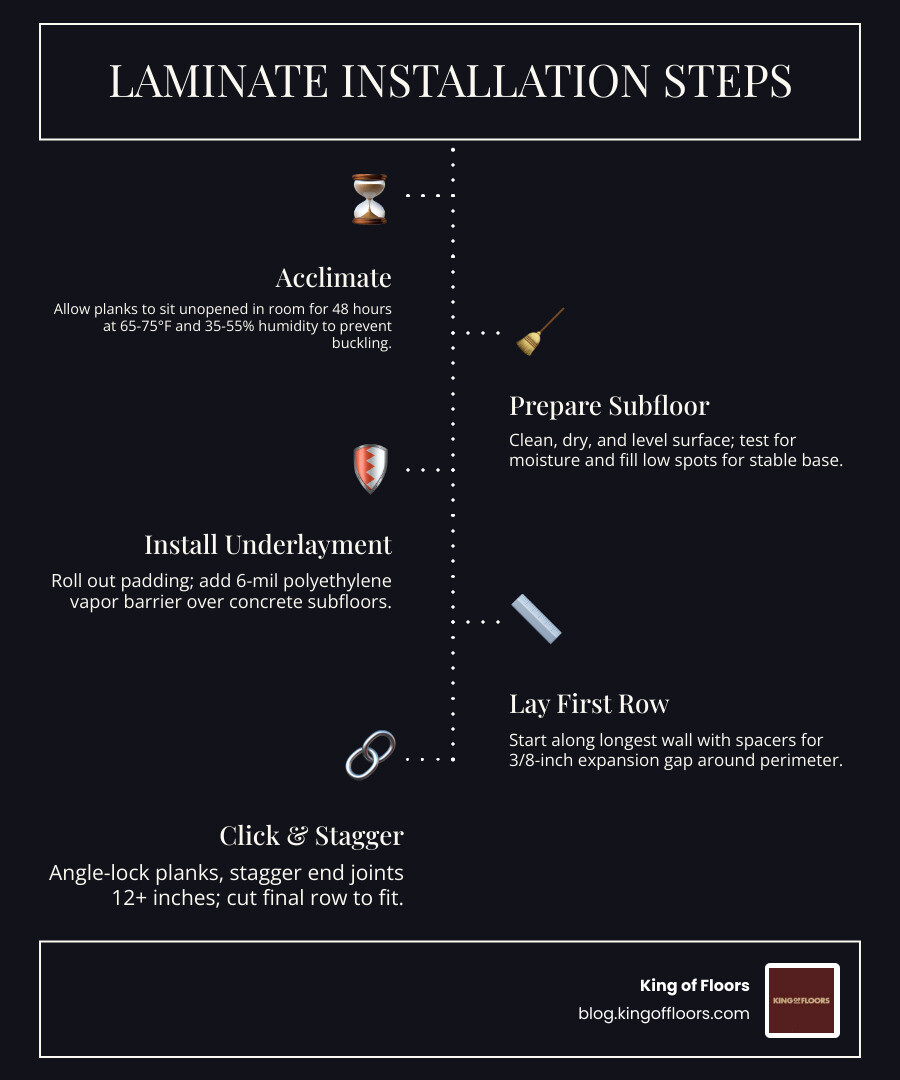
- Acclimate your planks in the room for at least 48 hours before you start.
- Prepare the subfloor so it is clean, dry, and level.
- Install underlayment (and a vapour barrier if you are going over concrete).
- Lay the first row along the longest wall, leaving a 3/8-inch expansion gap at the perimeter.
- Click planks together row by row, staggering end joints by at least 12 inches.
- Cut the final row to width and install baseboards or quarter round to cover the gaps.
Most beginners can complete a 200-square-foot room in 4 to 6 hours. Total material costs typically run between $600 and $1,200 CAD for a space that size, though buying direct from an importer like King of Floors means you skip the middleman markup entirely.
There is a reason laminate flooring has become the go-to choice for homeowners across Surrey and the Lower Mainland. It looks great, holds up to real life, and you do not need a tradesperson to put it down. We have seen this time and time again at our showroom: a first-time DIYer walks in a little nervous, asks the right questions, leaves with the right product, and a week later sends us a photo of a room that looks like a professional did the work. That is exactly what a good click-lock system and a bit of preparation can do for you.
I am Lesley Upton, Inventory Control Manager at King of Floors, and after sourcing and advising on laminate wood flooring installation projects since 2010, I have picked up more than a few practical tips that will save you time and headaches. Let us walk through the whole process together.
Laminate wood flooring installation terms explained:
In the Lower Mainland, our homes have to deal with a bit of everything—from damp, rainy winters to humid summer spells. Laminate wood flooring installation has surged in popularity because modern European laminates are engineered to handle these climate shifts better than almost any other material. Unlike solid wood, which can be temperamental when the humidity drops in a Cloverdale townhouse or rises in a North Surrey basement, laminate is remarkably stable.
King of Floors specialises in European quality. Our Swiss and Polish imports offer realistic timber visuals that are nearly indistinguishable from real oak or walnut. They are also built for busy households. Whether you have kids running through the halls in Fleetwood or a golden retriever on a scratch-resistant floor, laminate’s AC (Abrasion Class) rating ensures it can take the beating.
For those looking for the “best of both worlds,” we also stock a massive selection of engineered hardwood, but for pure DIY ease and cost-effectiveness, laminate remains the king.
Essential Tools for Laminate Wood Flooring Installation
Before you start, you will need a basic “warrior kit.” You don’t need to go out and buy a professional workshop, but having the right tools makes the difference between a floor that clicks and a floor that clunks.
- Rubber mallet and tapping block: To snug the planks together without damaging the delicate tongue-and-groove edges.
- Pull bar: Essential for those tight spots against the wall where you can’t fit a mallet.
- Spacers: To maintain that crucial 3/8-inch expansion gap.
- Circular saw, miter saw, or a dedicated laminate cutter: For those end-of-row cuts.
- Tape measure and pencil: Because “eyeballing it” is the fastest way to waste 10% of your budget.
- Safety gear: Eye protection and a mask are non-negotiable when cutting.
Understanding the Cost: DIY vs. Professional
One of the biggest questions we get at our Surrey showroom is about the bottom line. In Canada, and specifically the Lower Mainland, professional installation labour can add a significant chunk to your bill.
By handling the laminate wood flooring installation yourself, you can save anywhere from $2,000 to $10,000 on a full-house project. At King of Floors, because we are direct importers with 10 million square feet of in-stock inventory, our prices are already unbeatable. We cut out the middleman, so you get European quality at warehouse prices.
Always remember to purchase 10% extra to account for cuts and waste—nothing stalls a project like being two planks short on a Sunday afternoon in Langley! You can check our guide on the cost to install laminate flooring in vancouver for more specifics.
Preparing Your Space for a Flawless Finish
The secret to a floor that doesn’t squeak or bounce isn’t in the clicking—it’s in the prepping. We tell our customers in White Rock and South Surrey the same thing: spend 70% of your time on the subfloor, and the actual installation will be a breeze.
First, your subfloor must be clean, dry, and level. Any variation greater than 3/16 of an inch over a 10-foot span needs to be addressed. High spots should be sanded down, and low spots filled with a self-levelling compound. If you are installing over concrete—common in many Metro Vancouver basements—you must perform a moisture test. Concrete should be below 12% moisture content to avoid warping your new boards.
Don’t forget to undercut your door jambs. Instead of trying to cut the laminate to fit the complex shape of the trim, use a scrap piece of flooring as a guide and saw the bottom of the jamb so the plank can slide right under it. This creates a professional, seamless look. For more on what not to do, see our list of laminate flooring mistakes.

The 48-Hour Acclimation Rule
This is the rule most people want to skip, but in the Fraser Valley, it’s the most important. Laminate is made of high-density fiberboard (wood), which expands and contracts based on the environment.
Bring the unopened cartons into the room where they will be installed. Lay them horizontally (never lean them against a wall) and let them sit for at least 48 hours. This allows the material to adjust to your home’s specific temperature and humidity. Skipping this is the number one cause of “buckling” or “gapping” six months down the road. For technical details, we often refer customers to the Inhaus Laminate Installation Guide.
Choosing the Right Underlayment and Vapour Barrier
Underlayment isn’t just an “extra”—it’s a functional layer that provides sound reduction, a thermal barrier, and a bit of cushion. If you are in a condo in the City Centre (Whalley) or Guildford, your strata likely has specific “STC” ratings for soundproofing that you must meet.
If you’re going over concrete, a vapour barrier (like 6 mil polyethylene) is mandatory to prevent moisture from seeping into the core of your laminate. Many of our premium European products come with underlayment pre-attached, but always check the Egger Laminate Installation Guide or the flooring underlay section of our site to ensure you have the right setup for your specific subfloor.
Step-by-Step Guide to a Professional Result
Now for the fun part. Once your subfloor is ready and your planks are acclimated, it’s time to start laying.

Planning Your Laminate Wood Flooring Installation Layout
Before you open a single box, measure the width of your room. You want to avoid ending up with a tiny sliver of a board (less than 2 inches) on the final wall. If your math shows the last row will be too thin, rip some width off your very first row to balance the room.
When laying, always start along the longest wall. Use spacers to maintain a 3/8-inch gap between the planks and the wall. This “floating floor” needs room to breathe as the seasons change in the Lower Mainland. Always stagger your seams by at least 12 inches to create a natural “staircase” look. This isn’t just for aesthetics; it provides structural integrity to the click lock laminate system. For specific locking patterns, the Kronoswiss Laminate Drop Lock & Angle Angle Lock Guide is an excellent resource.
Mastering the Click-Lock Technique
Modern laminate uses one of two main systems: Angle-Angle or Drop-Lock.
- Angle-Angle: You insert the tongue into the groove at a 45-degree angle and fold it down.
- Drop-Lock: You lay the plank flat and “drop” the end joint into place, often requiring a light tap with a mallet.
The key is to ensure the joints are perfectly aligned before applying pressure. If it doesn’t click easily, check for debris in the groove. Never force it—that’s how tongues get broken! For a deeper dive into waterproof varieties, check out one simple way to install waterproof laminate.
Common Mistakes and Post-Installation Care
Even with the best intentions, things can go sideways. The most frequent errors we see involve:
- Forgetting expansion gaps: If the floor hits the wall, it will have nowhere to go when it expands, causing it to peak in the middle of the room.
- Installing over carpet: Never do this. The “squish” of the carpet will cause the locking joints to snap under the weight of furniture.
- Mixing batches: Always pull planks from 3 or 4 different boxes at once to ensure a natural blend of wood grains and tones.
For brand-specific nuances, always keep the Alsa Laminate Installation Guide or the Evoke Laminate Installation Guide handy during your project.
Handling Transitions and Finishing Touches
The floor isn’t finished until the trim is in. You will need T-mouldings for doorways or large spans (usually over 40 feet) to allow for independent movement between rooms. Reducers are used when transitioning to a lower surface, like linoleum or concrete.
When installing your baseboards, nail them into the wall, not the floor. If you nail through the laminate, you’ve just pinned your floating floor, which defeats the whole purpose of the expansion gap. For finishing guidance, see the Goodfellow Laminate Installation Guide or the Kronopol Laminate Installation Guide.
Maintenance Tips for Longevity
Laminate is low maintenance, but it isn’t “no maintenance.”
- Dry mop daily: Use a microfibre mop to remove grit that can act like sandpaper.
- Use pH-neutral cleaners: Avoid wax, polish, or steam mops, which can delaminate the edges.
- Felt pads are your best friend: Put them under every chair leg and table in your Newton or Cloverdale home.
- Manage spills: While we offer waterproof laminate with 72-hour protection, it’s still best practice to wipe up liquids immediately.
Why Buy from King of Floors?
We aren’t just another flooring store; we are a Surrey institution. Since 1984, our family-owned business has focused on one thing: getting high-quality flooring into your home for the lowest possible price.
Our direct-import model means we buy by the container-load from the best mills in Europe and pass those savings directly to you.
With 10 million square feet of inventory in our Surrey warehouse, you don’t have to wait weeks for shipping. You can pick up your order the same day and get started on your project in Langley, South Surrey, or anywhere in the Lower Mainland. Our staff are experts who can walk you through the technical specs of every box we sell.
Frequently Asked Questions
Can laminate be installed over existing flooring?
Yes, as long as the existing floor is hard, flat, and well-bonded. You can go over old tile, sheet vinyl, or wood. However, you must never install laminate over carpet or an existing floating floor, as the base will be too unstable.
Is laminate flooring suitable for bathrooms?
Modern water-resistant laminates are much better suited for bathrooms than they used to be. If you choose a product with 72-hour moisture protection and seal the perimeter with 100% mildew-resistant silicone, it can perform well. For full peace of mind, check out our waterproof laminate installation guide.
How long does it take to install a standard room?
For a standard 200-square-foot room, a beginner should budget about 4 to 6 hours. This includes the time to prep the subfloor, roll out underlayment, and make your final cuts.
The Smart Way to Approach Laminate Wood Flooring Installation
Laminate wood flooring installation is a rewarding way to transform your home without the stress of a massive renovation budget. By following the 48-hour acclimation rule, ensuring your subfloor is level, and taking your time with the first row, you can achieve a professional-grade finish that will last for decades.
Ready to start your project? We invite you to visit the King of Floors showroom in Surrey to see our massive selection of European stock in person. Whether you are in Vancouver, Langley, or the North Shore, it is worth the drive to see the quality and experience the savings of buying direct.
Browse our full range of laminate flooring today and let’s get your weekend project started!